December 6, 2010
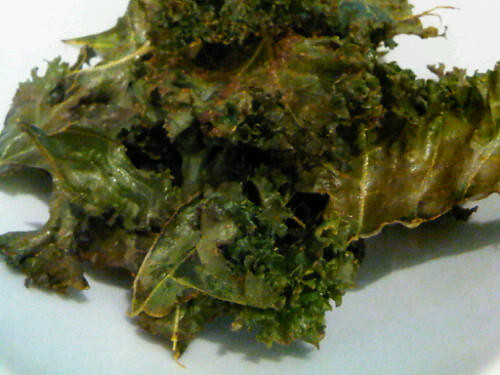
Curried kale chips
Just because I had a huge kale and to see what all the fuss was about, I made kale chips today. When I was looking for a recipe, I noticed there were so many people blogging about these, I just had to try them.
I actually made them twice.. The first batch failed horribly. I followed a recipe exactly, but somehow my oven was a little hotter at the same temperature, and I burnt them. They were totally black, and my whole home smelled really bad because of it. Of course that made me want to make these chips successfully even more.
Luckily my second batch worked out just fine; I put the oven temperature a little lower and sat in front of the oven almost the whole time. Ready to jump into action, in case something went wrong.
The recipe also told me to 'massage in the oil'. Well, I'd never given a veggie a massage before, but perhaps that's why these taste so good?
Here's my version:
Curried kale chips (serves 1)
- 4 kale branches
- 1 tbsp olive oil
- 1 tbsp lemon juice
- 1 tsp curry powder
1. Preheat the oven to 175 degrees Celsius and line a baking tray with parchment paper.
2. Rinse the kale branches and dry them with some kitchen paper.
3. Tear the green leaves off, along the thick stems (don't use the stems), and tear them into bite-sized pieces.
4. Combine oil, lemon juice and curry powder in a bowl, and pour it over the kale pieces.
5. Gently mix everything with your hands, then divide the kale over the baking tray. Make sure they don't overlap, so they'll cook evenly.
6. Bake for about 10 minutes, until dark green and crispy. Let them cool for a few minutes and enjoy!
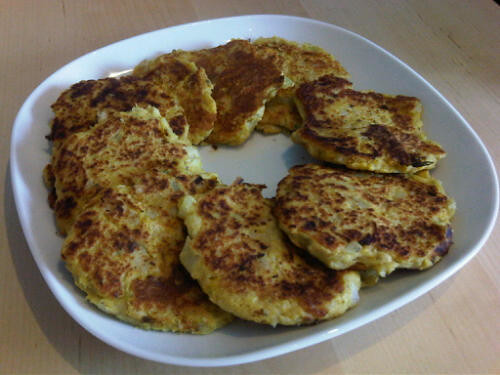
Taro fish cakes
Finally I got the time to use my taro roots. I bought them last week, and kind of hoped they would keep in the fridge until today. They did!
At first I wanted to make a cake with them, but since I already stuffed myself with pumpkin pie and some muffins last weekend, I decided to make something else: fish cakes.
It took me a while to make them, and everything went wrong this morning, but in the end they worked out just fine and delicious.
Just to let you know what went wrong today:
- I cut my finger on my hand blender, didn't notice and soon the blood was everywhere.. (not in the food though, luckily)
- While transferring a big spoonful of fish cake mixture to a pan, it dropped on the floor (obviously)
- I tried to make kale chips, did everything the way they told on a youtube film, and burnt them. And I mean that in the non edible way. (later today I made them again, this time it was a success, will post recipe soon)
- And because of a huge layer of ice and snow remains on the cycling paths, I couldn't go to the market to buy fresh herbs and veggies. (the local government seems to think it's unnecessary to clean these..)
Anyway! That's just the bad stuff, sharing helps me feel better about it. In the end I did have a relaxing day at home, with fish cakes for lunch.
I'm not sure if taro roots are completely paleo though.. They seem to contain quite a lot of starch, and they're inedible when they're raw. In that case, they wouldn't be all that paleo. However, they have been eaten for a really long time, they were consumed before grains and potatoes were added to people's diet. That would make them more paleo.
Confusing as it is, I suggest eating them just once every now and then.
Taro fish cakes (makes 10)
- 3 small taro roots, steamed for 40 - 45 minutes (don't peel them!), until completely cooked
- 3 white fish fillets (like tilapia, or yellowfin sole) OR 2 salmon fillets, steamed for 8 - 12 minutes, until cooked
- 1 onion, chopped
- 1 egg
- 2 tbsp lime juice
- 1 heaping tsp curry powder
- 2 tbsp fresh coriander leaves, chopped
- 2 tbsp sesame seeds
- ground black pepper, to taste
- 3 tbsp coconut oil, for frying
1. Peel the skin off the cooked taro roots, cut the flesh into chunks and puree.
2. Pull the cooked fish into small pieces with a fork, add to taro puree.
3. Add onion, egg, lime juice, curry powder, coriander, sesame seeds and pepper, and stir until well combined.
4. Heat 1 tbsp coconut oil in a frying pan, and drop 3 or 4 big heaping tablespoons of fish cake batter into it. Slightly flatten them out with the back of a spoon, to shape them into patties.
5. Reduce heat to medium, and when the patties are golden brown on the bottom, flip them over and fry them on the other side until golden brown as well.
6. Transfer to a plate and repeat with the rest of the batter. Serve warm.
They would be great with a salad, or some stir-fried veggies.
Just a quick note, in case anyone notices; my recipe says 'makes 10', but there are only 9 cakes in the picture. I ate the 10th one before taking the picture, I was hungry!
Samosas and walnuts
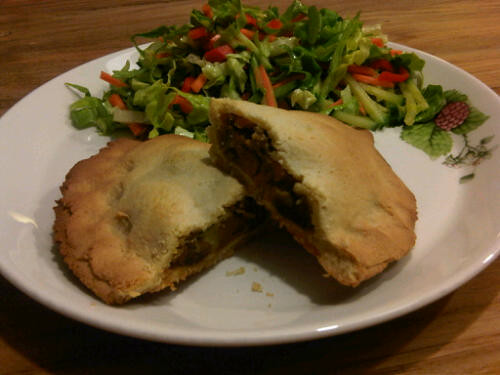
Here's what I made, together with my mom last Saturday. We've already had this idea for a while, but haven't had the opportunity to actually do it before.
We made Samosas! Of course they're grain fee and dairy free.
My mom had made a delicious Moroccan oven dish for lunch on Saturday, with mince beef, dried apricots, tomatoes, zucchini, onion, ras el hanout and more. We had some leftovers, and since we'd already had the idea to make samosas sometime, we thought this would make a great filling.
For the dough, we used this recipe for biscuits from Elana's Pantry. We'd already made the biscuits once, loved the dough and recipes kept popping up into our heads.
Our samosas turned out pretty big, one batch of dough made 6 samosas. But I think you could easily make 8 smaller ones out of it.
We simply rolled out balls of dough with our hands on a piece of parchment paper, put about 2 tablespoons of filling on it, folded them in half and pressed the edges onto eachother. Super easy!
We baked them at 175 degrees Celsius for about 20 minutes, so they browned nicely.
We served them with a salad and had them as a light meal.
I'm going to make these again, as soon as I have some leftover chicken curry as I think that would make a good filling. Spinach would be great too! I'm also going to adapt the dough recipe by then, I've already got a nice idea on how to do that.
This week, I'm having loads of veggies to cook with again. My aunt has a huge vegetable garden and she gave some of her 'harvest' to my mom and me. I got one huge kale, some leeks, carrots, kohlrabi, winter lettuce, a paprika and some beets. I love beets, but I've never cooked with them before, so I can't wait to make some delicious recipes with those.
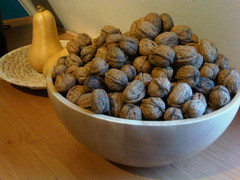
I also got walnuts; loads of walnuts, as you can see on the picture below. I had just run out of supply, so I'm really happy with these. They make a good addition to so many recipes!
So, what I wanted to ask; does anyone have an easy way to crack these? My mom gave me a nut cracker, but I'm afraid that if I work my way through this pile I won't have any hands left. Or should I just do a few at a time, when I need them?
December 4, 2010
Pumpkin Pie
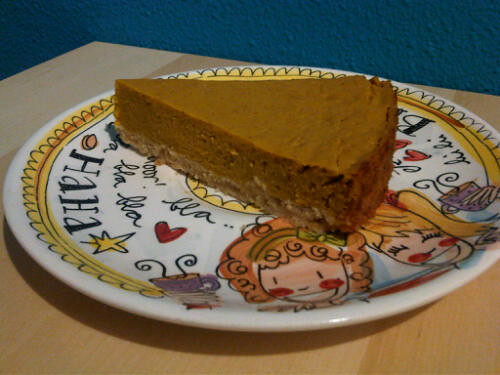
My first attempt on making pumpkin pie. It's really good! Not too sweet, but it's not like you're eating just pumpkin either. It's not too heavy or filling, but still satisfying. I couldn't resist having a piece for breakfast today..
My inspiration for this recipe came from this Pumpkin Pie recipe from Everyday Paleo. But I made a different crust and adapted the filling recipe too, making it totally fruit sweetened and adding some more pumpkin.
Pumpkin Pie
Crust:
- 1 1/2 cup of almond flour
- 1/4 cup coconut oil, melted
Filling:
- 500g pumpkin puree or cooked chunks
- 2 eggs
- 1/2 cup coconut milk
- 2 bananas
- 1 1/2 tsp cinnamon
- 1 tsp cookie spices (or a mixture of ginger, cloves and nutmeg)
1. Preheat oven to 175 degrees Celsius. Line a tart pan or (spring) cake tin with parchment paper, or grease it with some oil.
2. Mix the ingredients for the crust in a bowl and spread it over the bottom of the cake tin, press down to form a nice crust. Bake for approx. 12-14 minutes, until it starts to brown.
3. In the mean time make the filling by combining the ingredients for the filling in a food processor. Process on high for about 30 seconds, until well-combined.
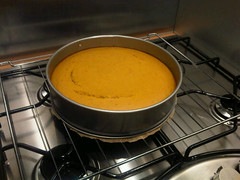
4. Pour the filling into the baked crust and bake for another 45 minutes, until set.
5. Let it cool and serve! Would be great with some coconut cream.
Pumpkin puree is really easy to make; just put a small pumpkin into the oven on 200 degrees celsius for about an hour, let it cool and peel the skin off. Cut it into chunks, removing the seeds and threads, and puree.
December 3, 2010
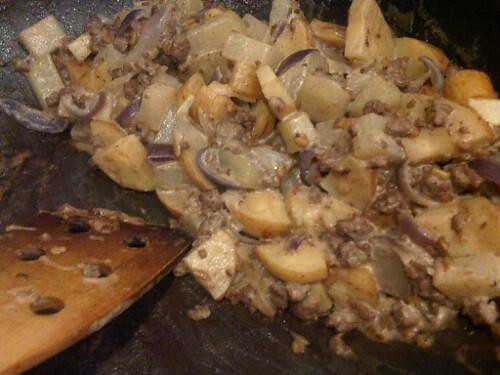
Parsnip and kohlrabi beef curry
Next time I'm going to make this with a banana in it, I think that would work really well.
Parsnip and kohlrabi beef curry
- 3 parsnips, in small cubes
- 1 large kohlrabi, in small cubes
- 2 small red onions, chopped
- 200g minced steak
- 1 can (400ml) coconut milk
- 1 clove garlic, chopped
- 1/2 tsp fenugreek seeds
- 1 tsp cardamom
- 1 tsp freshly grated ginger
- 1 tsp cinnamon
- black pepper to taste
- 1 tbsp freshly chopped coriander leaves
- 1 tbsp vegetable oil, for frying
1. Heat oil in a frying pan and fry the meat until browned.
2. Add the onion, garlic, ginger and fenugreek seeds, stir-fry until the onion starts getting soft. Then add the parsnip and kohlrabi.
3. Stir-fry a few minutes, then add the cardamom, cinnamon and pepper and the coconut milk. Stir well, reduce heat to low, cover and leave for approx. 10 minutes.
4. Sprinkle coriander on top and serve.
Next up: baking a pumpkin pie.. I'm going to do that right now.
December 2, 2010
Black radish chips and Italian chicken
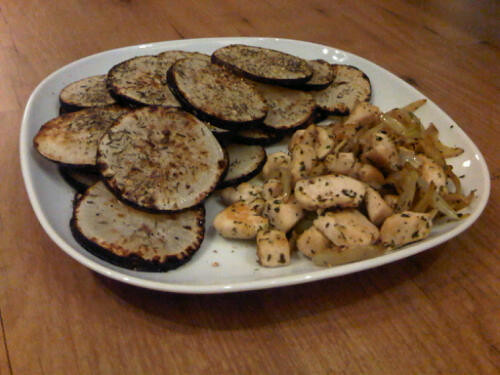
Here's what I did with my black radish today. Again, I didn't know what a black radish would taste like and after googling it, everyone seemed to recommend either frying it or putting it into a salad. I chose to fry mine, I simply cut it up in thin slices, heated some oil in a frying pan and fryed them on both sides until browned and soft.
I let them drain on a few paper towels, sprinkled them with lemon pepper and thyme and that's it!
It was really easy, and I would recommend serving these as a side dish. They're quite tasty and you could add some more spices too if you like.
Tonight I served these with Italian stir-fried chicken. One of my favourite quick chicken fixes. Simply cut a chicken fillet into cubes, chop up an onion, heat some oil in a frying pan and fry chicken until browned. Add the onion, stir-fry until soft and browned and add some pepper and dried Italian herbs. Easy does it.
Even better: I got some chicken left over for my lunch salad at work tomorrow!
As we speak my turnips are in the oven, they need another 45 minutes to go.. I realised I bought a little too many veggies this week, because I'd forgotten I wouldn't be at home during the weekend. That's why I'm making an extra dish today; I'm simply going to freeze it and have it next week or so.
Turnips seem to be good when baked or pureed, so I chose to bake them this time. Hopefully I can get my hands on some more at the market on Monday, so I can try and puree them as well.
I still need to make a pumpkin pie, and use my taro roots as well. So I guess I've got a lot of cooking to do before Saturday!
December 1, 2010
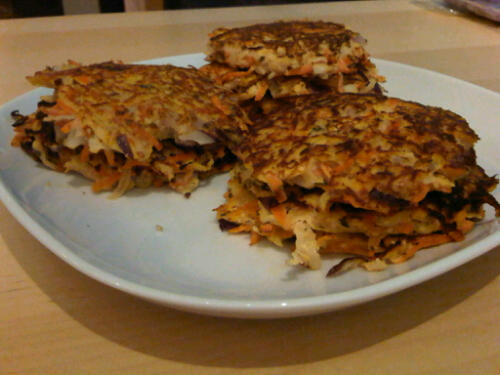
Even better Daikon fritters
Today it was time to use the other half of my daikon radish, and because I thought there would be a way to make those fritters I made with the first half even better, I tried making fritters again.
And they did turn out better!
I was quite happy about that, because yesterday I used my Thai eggplants and okra to make a beef stew. I added all these wonderful spices and it smelled great, until I tasted it.. It was really bitter, I guess I could've known with eggplants. I ate it anyway, but right after swallowing the last bites, I had some fruit to make the bitter taste go away. So that wasn't much of a success..
As for these fritters, I simply added a few ingredients and left some out; I added carrot, replaced the shallot with a red onion, replaced almond flour with coconut flour and added some more sesame seeds and an extra egg.
They didn't even need a sauce, unlike my previous attempt on daikon fritters.
Daikon fritters (revised, makes 10 fritters)
- approx. 15 cm of daikon
- 1 small carrot
- 1 small red onion, finely chopped
- 3 eggs
- 2 tbsp coconut flour
- 1 small red onion, finely chopped
- 3 eggs
- 2 tbsp coconut flour
- 1 tbsp arrowroot
- 2 tbsp sesame seeds
- 1 tbsp fresh coriander leaves, chopped
- 1/2 tbsp freshly grated ginger
- pepper to taste
- vegetable oil, for frying
- 2 tbsp sesame seeds
- 1 tbsp fresh coriander leaves, chopped
- 1/2 tbsp freshly grated ginger
- pepper to taste
- vegetable oil, for frying
1. Grate the daikon and carrot in a large bowl and add the red onion.
2. In another bowl, mix eggs, coconut flour, arrowroot, sesame seeds, coriander and ginger.
3. Add the egg mixture to the vegetables and stir until well combined.
4. Heat some oil in a frying pan and drop in a big, heaping tablespoon of the daikon mixture.
5. Reduce heat to medium, and flip the fritter when it starts to brown on the sides. (approx. 3 minutes)
6. Fry for another 2-3 minutes on the other side, until browned, and transfer to a plate.
7. Repeat with the rest of the daikon mixture. Of course you can always fry multiple fritters at the same time, depending on the size of your frying pan.
8. Serve with a green salad, or as a side dish. Works great for breakfast too.
5. Reduce heat to medium, and flip the fritter when it starts to brown on the sides. (approx. 3 minutes)
6. Fry for another 2-3 minutes on the other side, until browned, and transfer to a plate.
7. Repeat with the rest of the daikon mixture. Of course you can always fry multiple fritters at the same time, depending on the size of your frying pan.
8. Serve with a green salad, or as a side dish. Works great for breakfast too.
Subscribe to:
Posts (Atom)